Fermenting and freezing are your secret weapons for preserving root vegetables
You’ve pickled cucumbers, made sauerkraut and frozen your summer berries, but have you ever used these techniques on your root vegetables? As our gardens and CSAs wind down and temperatures cool, there are still plenty of wonderful in-season root vegetables to enjoy, including carrots, potatoes, beets, onions, ginger and more. But what if you’ve roasted, and fried, and made soup for days, and you’re ready for something different? Your freezer and your pickle jar are your secret weapons for enjoying ready-made root vegetable meals for months to come.
I’m a pickling, canning and fermentation expert with several fermentation and preserving books under my belt, and I’ve been teaching both professionally since 2018. Time and again, I’ve realized that root vegetables get ignored when people work to preserve food for winter, not because we don’t love having them with winter meals, but because we don’t realize their preserving possibilities.
What’s great about them is that, when prepared correctly, they can easily become the base to ready-made meals, like soup starters, sauce cubes or pastes. Once you’ve fermented or cooked the root vegetables, you can prep and pre-measure them before you freeze them so you can quickly reach for them even when energy and time are low. And they make for simple snacks and sides, too.
Lactofermentation basics
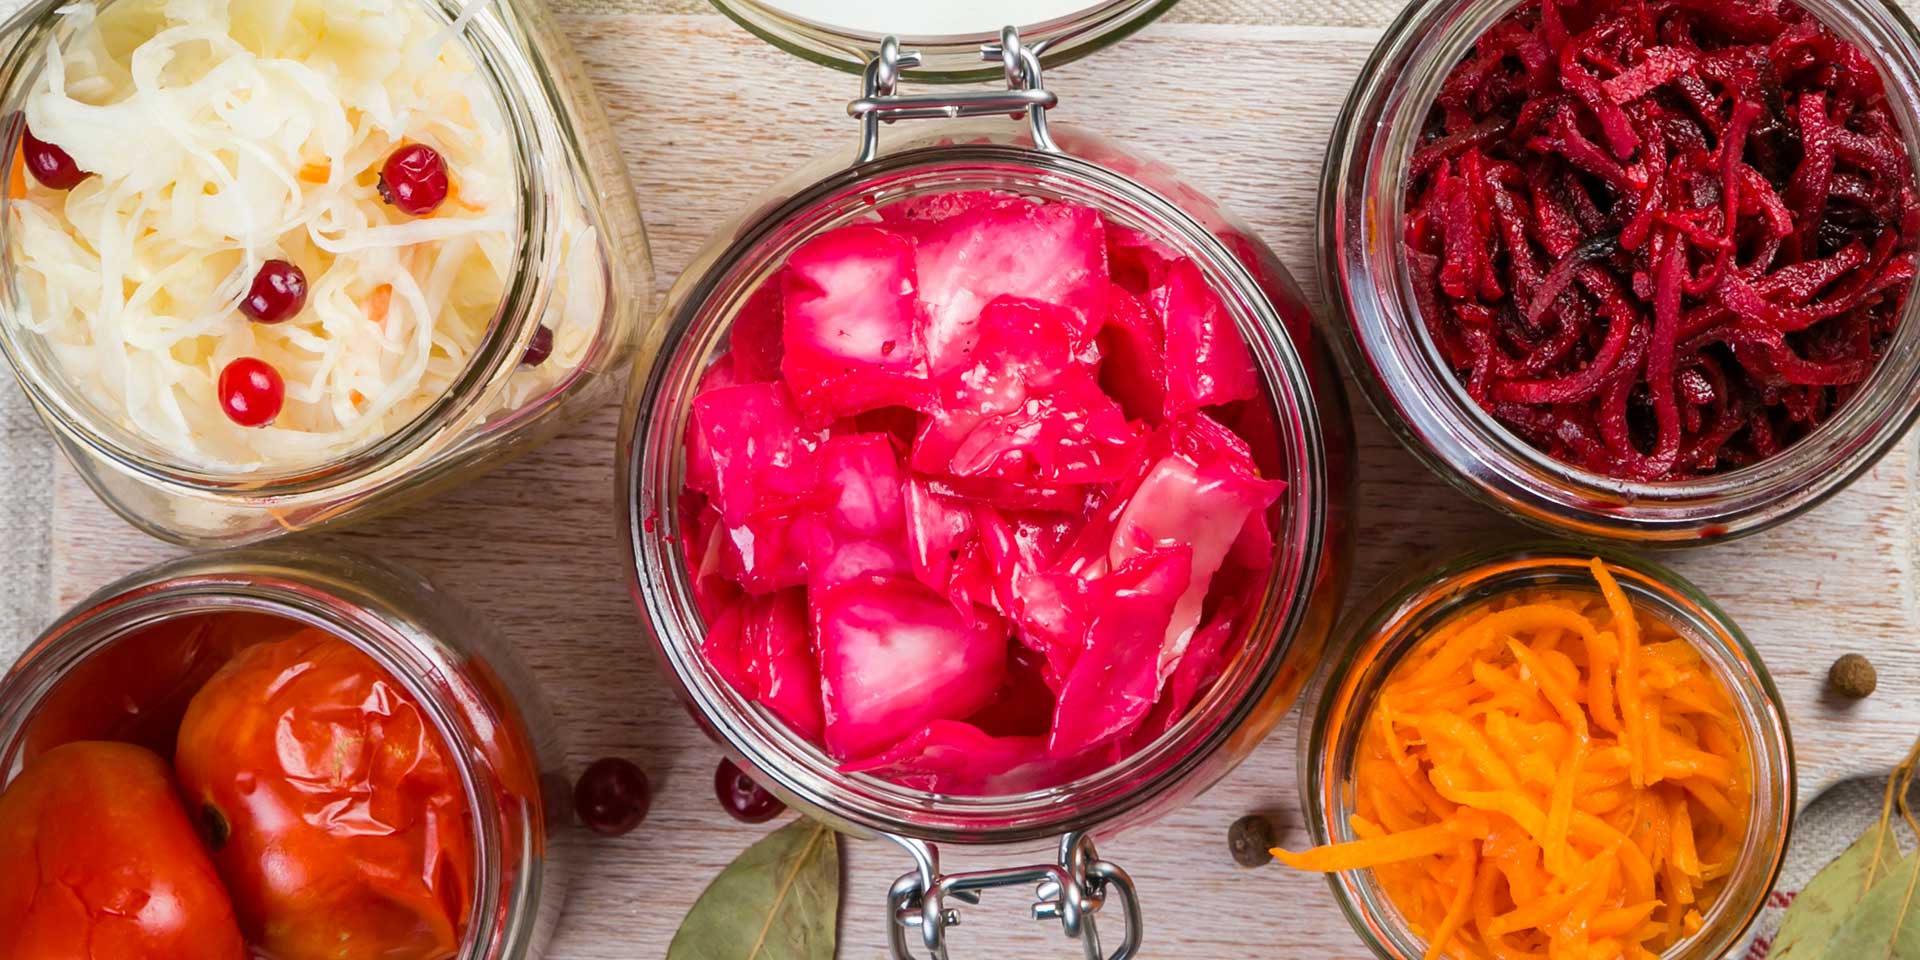
Lactofermentation is a simple way to add flavor and nutrition to your vegetables, and is the perfect project for beginners. Vegetables are submerged in brine that’s between about two to five percent salt and allowed to sit at room temperature, so beneficial bacteria can grow.
The salt inhibits the growth of pathogenic microbes. Keeping the vegetables completely under the brine allows the anaerobic bacteria (ones that don’t need oxygen) to grow and keeps aerobic microbes (like mold spores) away.
To lactoferment vegetables, simply pack them into a foodsafe container with a lid (a jar is the perfect choice here). Then, mix up your brine by whisking between one to two tablespoons of salt in one quart of room temperature water until dissolved. Then, simply pour the brine over your vegetables until completely covered, topping them with a weight, if needed, to keep them submerged.
This method of pouring brine over raw vegetables gives us some of my favorite root vegetable ferments. You can ferment your carrot sticks for an easy, healthy snack, or use that same lactofermentation technique to make pickled beets and beet kvass (a tangy beverage made by fermenting beets and stale bread in brine).
You can also lactoferment vegetables by massaging them with salt. This works well for sauerkraut or for kraut-chi, a hybrid of sauerkraut and kimchi that uses any grated or shredded veggies you have to hand (a great way to cut down on food waste).
General freezing guidelines for root vegetables
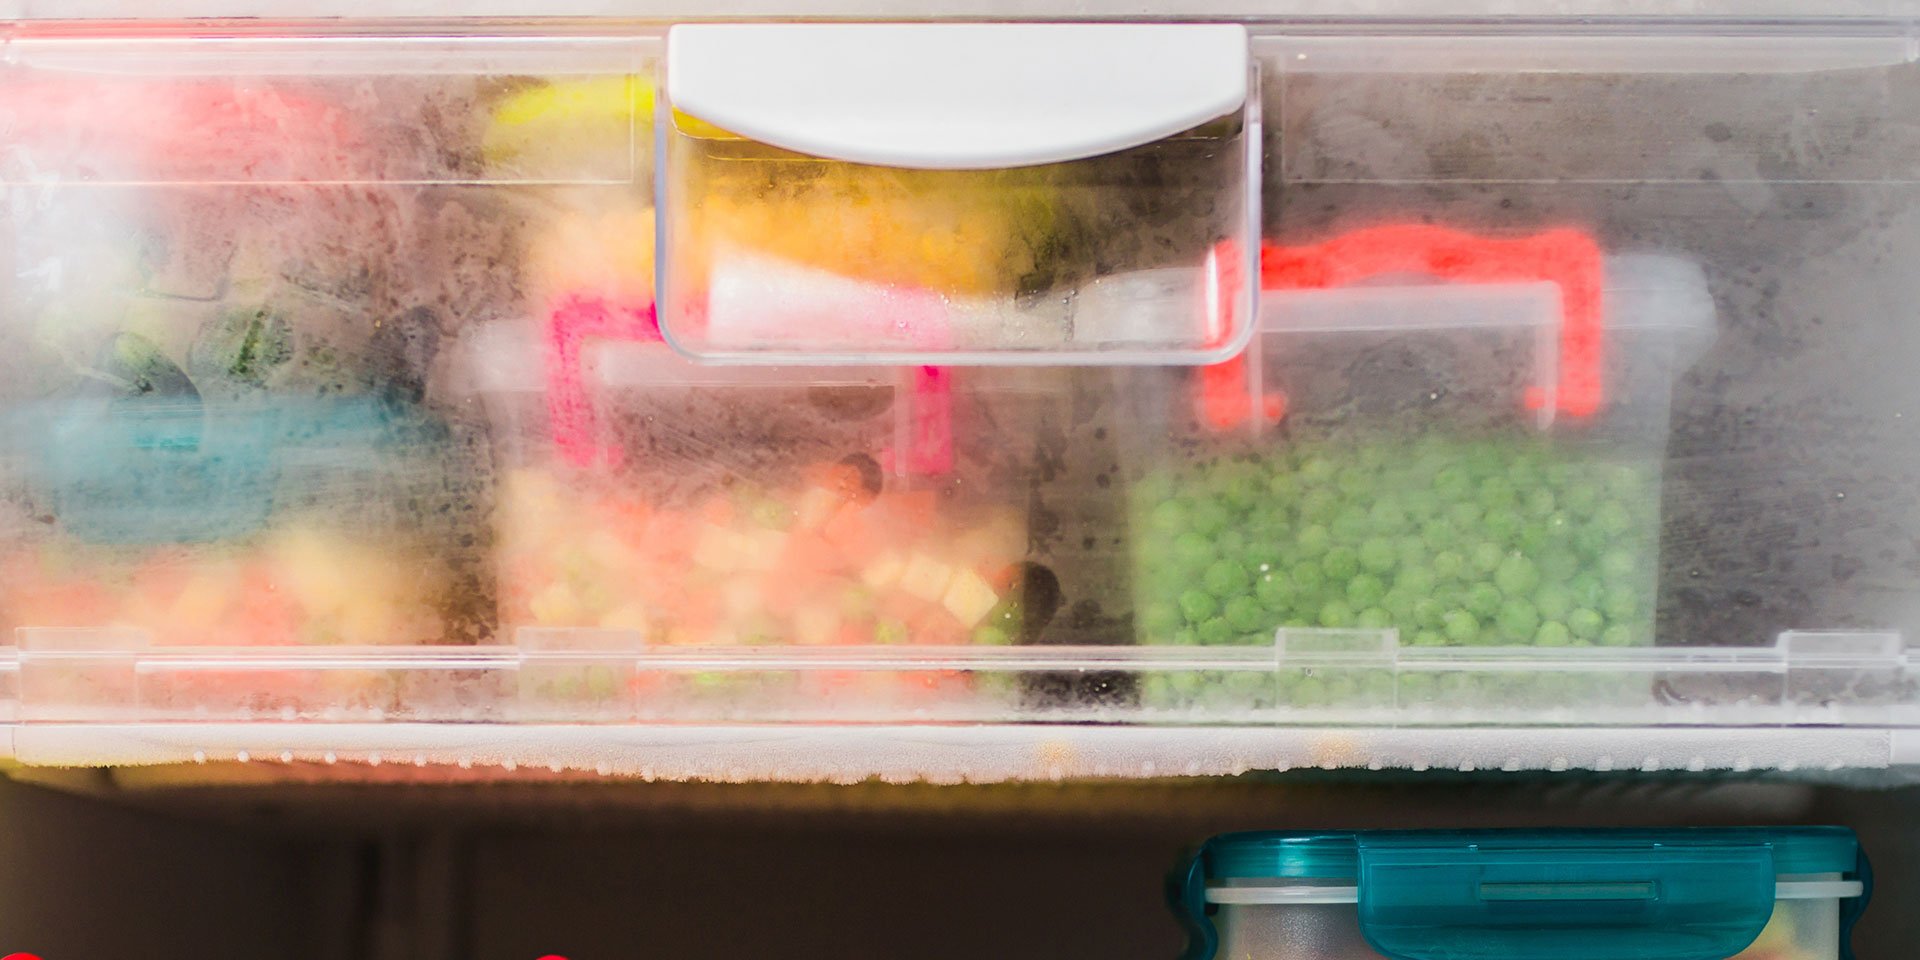
Most fruits and vegetables need to be blanched for several minutes before shocking (cooling quickly in ice water) then freezing: This kills the enzymes that can negatively impact color and flavor later.
To blanch your vegetables, boil enough water to completely submerge them, then put pieces of root vegetable in the water for three minutes for smaller pieces (one to two inches, or rounds), or five minutes for large pieces (more than three inches). When you’re freezing grated or ground vegetables, like Rainbow Roots Soup Starter, blanching becomes optional since the vegetables are being cooked down and served in other dishes.
Pack the vegetables in a wide-mouthed, freezer safe container with a half inch of headspace (room between the top of the food and the rim of the container), since the product will expand as it freezes. Alternately, you can pack them in a plastic or silicone zippered bag using the water displacement method to create something like a vacuum seal.
The frozen ready-made ingredient possibilities are endless. One of my favorites is to prep mirepoix (usually a sautéed mixture of diced vegetables) or trinity (similar, but for Cajun or Creole cuisine) for my winter soups. Dice your carrots, onions, and celery (for mirepoix), or onions, celery, and green pepper (for trinity), then freeze in a single layer on a lipped 1/4 size sheet pan. Pack frozen veggies into a freezer-safe container, then freeze again. Or freeze in smaller containers if you want premeasured amounts. When it’s time to cook, simply add to a pot with other ingredients for stock, or let thaw slightly in the fridge and brown before adding stock.
Root Vegetable Recipes
As I worked on my next book, “The Essential Preserving Handbook,” I tested hundreds of recipes for every vegetable imaginable: But it’s these root vegetable recipes that I keep coming back to again and again.
Rainbow Roots Soup Starter
This is a frozen vegetable and aromatics blend made with filling winter veggies that serves as the base for nearly every recipe I make.
Toss a handful or two of frozen starter into simmering stock or water for a quick vegetable soup (I add about one cup of vegetables per two-three cups of stock), or whisk in some white miso after you have removed from the heat and you have a quick vegetable miso soup. Add the starter to pasta or grains during the last few minutes of cooking for a burst of color, flavor, and nutrition — just a couple of tablespoons per serving, or more for an extra punch of flavor or color. You can also mix it into spaghetti sauce or (if thawed and squeezed of its excess moisture) add a teaspoon or two to your omelet or scrambled eggs.
There is also room to experiment with your favorite flavors: I use cumin and caraway seeds in my version, but they can easily be replaced with your favorite spices or dried herbs.
Make ~1 gallon freezer bag
Ingredients
2-3 large beets
4 large carrots
1 yellow onion
4 cloves garlic, minced
2 ribs celery, finely diced
1/2-1 tablespoons crushed red pepper
1/2-1 tablespoon cumin seed
1/2-1 tablespoon caraway seed
Method
- Grate beets, carrots, and onion with a box grater or food processor.
- Toss together with remaining ingredients until evenly mixed.
- Store in a freezer bag or airtight freezer-safe container, filling completely or pressing the extra air out of the bag.
- Store in the freezer and use within 6 months.
Beet pasta sauce cubes
Pasta is one of my go-to meals when I’m not sure what else to make: particularly when I can throw together a sauce in the time it takes my noodles to cook. Several years ago, I saw Nadiya Hussain’s Time to Eat on a long-haul flight, and was instantly obsessed with her beetroot pasta.
I would often make the sauce and use it over the course of several meals, but then I had an epiphany: If I froze the sauce in ice cube trays (which is how I premeasure many of my frozen ingredients, from citrus juice to egg yolks), I could easily have a flavorful sauce in single servings, waiting for whenever I want it. This recipe, inspired by Hussain’s beetroot pasta, is my freezer-friendly version. In Hussain’s recipe, she adds feta and fresh dill when serving, which I highly recommend here, too.
Makes ~16-18 cubes
Ingredients
2 large beets, unpeeled and washed, cut in 1” cubes,
1/4 cup red wine
juice and zest of 1 lemon
1 teaspoon honey or agave syrup
salt to-taste
1/2-1 teaspoon black pepper
2 red birdseye chiles, stems removed,
2 cloves peeled garlic
1/4 cup extra virgin olive oil
1/4 cup packed fresh basil or dill
Method
- Steam beets until fork tender, drain, reserving liquid.
- Cool and add to a blender with remaining ingredients except fresh herbs.
- Add enough cooking liquid to blend, and blend until smooth.
- Add herbs and blend until chopped and evenly distributed.
- Spoon into an ice cube tray, tapping gently on counter to remove any air bubbles.
- Float a splash of olive oil on top of each cube, just to cover the surface.
- Freeze overnight, or until frozen through, then pop out cubes and store in an airtight, freezer-safe container with no headspace.
Making pasta:
Per 1 cup of cooked pasta, use 1-2 cubes. Reserve a couple spoonfuls of pasta cooking water: Add your cube(s) to your pot as your pasta drains, along with the cooking water, and cook until heated through. Toss with pasta and top with crumbled feta cheese and fresh dill (or your favorite toppings).
Three Root Paste (from “Our Fermented Lives”)
This simple seasoning paste is an easy way to use up any extra knobs of aromatic roots, like ginger, offering a lot of flavor payoff without a lot of work. I pack the jar tightly with my sliced roots, which helps them stay under the brine as they ferment. This is more a technique than a strict recipe, and you can swap in your favorite other root vegetables (or make use of those extra chunks of carrot, beet, turnip, etc.). You can also combine root vegetables with non-root vegetables (like hot peppers). You can add onion, though I find that onion can develop some undesirable flavors if it ferments for too long.
Makes one pint
Ingredients
3 pieces fresh organic turmeric root, sliced
1 bulb garlic
1 large piece fresh organic ginger, sliced
1/2 tablespoon sea salt or other unrefined salt
Note: When using ginger as the basis for a wild-fermented food, always use organic ginger (and other organic roots, to the extent possible). Non-organic ginger is often imported and irradiated, which kills the microbes that you want present to kick-start your ferment.
Method
- Fill a pint jar one-third of the way full with a layer of unpeeled garlic cloves, followed by a layer of sliced turmeric, and finally a layer of sliced ginger. The skins on all of these will soften as they ferment, so there’s no need to peel unless you wish!
- Add the salt and fill with enough water to cover. Seal tightly and shake until the salt is dissolved. Make sure the brine is still completely covering the roots (if it isn’t, push the roots back under the brine).
- Ferment at room temperature until the mixture reaches a flavor you enjoy, 7 to 10 days.
- Pour the contents of the jar into a food processor or blender and blend to your desired consistency. For best flavor, store in the refrigerator, where it will keep for at least a month.
Variation: Use this same method to make homemade prepared horseradish. Pack your jar as above, let ferment for a week or more until fragrant and softened, then process or blend and store in the fridge.
Get the latest food news from FoodPrint
By subscribing to communications from FoodPrint, you are agreeing to receive emails from us. We promise not to email you too often or sell your information.
Top Image Credit: Julia Skinner
More Reading
How I used cookbooks to spring clean my pantry
March 2, 2026
Simple ways to turn kitchen scraps into delicious soups
December 23, 2025
Leftover garlic? Our tips to use every clove
June 16, 2025
4 Tips for Stretching Your Food Dollars
April 16, 2025
How to use extra onions
April 9, 2025
For lessons in thrifty, climate-friendly cooking, look to vintage cookbooks
March 10, 2025
Resources to help you pickle, ferment, jam, can and more
October 16, 2024
Quinces are due for a renaissance
September 16, 2024
How can we cut food waste in half by 2030?
September 5, 2024